Thursday, April 30, 2009

Homemade is BEST!

Here are some more of the pictures I took with my new camera. It's not the most fabulous, high-tech camera, but I think I've taken some pretty good pictureswith it.

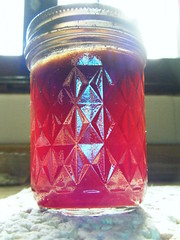
This jar of homemade cherry jelly was canned a little over a year ago by my mother-in-law. The cherries are so pretty when they are ripe; they are the small, bright red ones that are tart and sweet at the same time. We went out to the two bushes on the edge of her yard, and spread a huge old bedsheet on the grass around the first bush, and then the second. My three boys and Grandma and I picked cherries for about an hour and a half, eating some and making sure to keep enough for the jelly.

I have a ton of jam & jelly recipes to share with you, but that will come later in the season when it's time to start canning... so get ready!

This is raspberry jam...

Which is another one I love. I also love the color...

The best way to enjoy homemade jam...

Now is the best time to plant strawberries. Mine have almost taken over the entire garden, so I may just let them go and start another garden in another spot of my yard... maybe. My husband liked that idea, because he likes the berries. We will see. I may just transplant some to strawberry planters, so I can add a little height to a vacant area in my flowerbed. I haven't decided yet.

Wednesday, April 29, 2009

Yellow & Red Canned Tomatoes and Rosemary 4-18-2009

I bought a new camera a few weeks ago, and decided to take some food photos. My mother-in-law canned these tomatoes last summer; I thought they looked pretty with both the red and yellow tomatoes in the same jar, so I wanted to share this one with you. The rosemary in the dish was just thrown in for the heck of it, but I figured you may also want my very simple recipe for rosemary potatoes - one of my kids' favorites.

Rosemary Potatoes

Small red potatoes, washed (leave the peels on), 2 or 3 per person
4 tablespoons Butter (enough for 10 small potatoes)
1/4 cup chicken or turkey broth
2 tablespoons rosemary

Boil the potatoes in water until almost fork-tender (about 5 minutes until done); add rosemary, continue to boil until potatoes are done.
Drain off water. Some of the rosemary will remain in the pot, that's ok. Melt butter in microwave, then stir in chicken broth. Pour over potatoes, stir to coat.

This goes well with chicken or turkey.

Thursday, April 23, 2009

Indian Tacos and Thanks, SquirrelQueen!


Day 133 - Indian Taco
Originally uploaded by Terrawoods

Many thanks to SquirrelQueen for a bit of inspiration for today’s blog. To answer her question, yes, in fact, I was a Girl Scout! Well, a Brownie, anyway. My own experience with scouting wasn’t very outdoor-oriented, in fact most of the activities we did involved indoor crafts and volunteering at the local nursing homes. It was a great experience, nonetheless.

I’ve always loved spending time in the woods and outdoors. I learned most of my outdoor survival skills from my father, and added to those during my time spent at an outdoor survival camp for delinquent girls. I learned a ton more while living with tribal members of the Mille Lacs Band of Ojibwe, in Central MN. I have camped outdoors in all types of weather, even at temperatures of 40 degrees (Fahrenheit) below zero. I can build my own shelter and survive on berries and plants if I have to. I could give you a recipe for wild rice cooked with onions and wild mushrooms; or I could ramble on about how the root of the cattail is edible, once peeled and boiled like a potato. However, many wild mushrooms that look edible can kill you, and cattail does not really taste like potato, unless you like your potatoes grown in a mucky, fishy swamp, with the taste to match. Venison is great, but if you don’t hunt or know someone who does, it can be hard to find in your typical grocery store. I may eventually get to a recipe or two for that in the fall, though – we had some venison sausage last night for dinner and it was wonderful! Not to mention that I have a recipe for the world’s best venison crock-pot stew. I will have to share that with you some other time, though!

First of all, I need to explain that when I say Indian, I am referring to Native American. None of the Natives I personally know take offense to it, which is why I use that term. Some people of the younger generation would rather be called Native, and I use that term too. Though I myself am not Native American, my father was born on the White Earth Indian Reservation, and my nephew is Native (I just love him to pieces!). I would never purposely insult him or anyone else by using a derogatory racial slur. I know some people are rather sensitive to this issue, so if you are, it is not intended to be insulting.

When I lived at the ranch in Onamia, very near the Mille Lacs Reservation, there were always lots of people around; mostly kids, often there were plenty adults there, too. My friends that owned the ranch had at least 40 horses, and during the summer they gave guided trail rides and would allow people to camp on their land. That is how we met. Every weekend I was camping up there and riding horses. Eventually, with the guidance of my friend, I bought a horse at auction and boarded her there. When I moved from Minneapolis to the Mille Lacs area, I lived with my friends on the ranch for about 4 months while looking for a farm of my own to purchase. In exchange for room & board, I took care of animals and did daycare on the side for other friends who had to work “real” jobs. Each morning started around 5:00am. I would roll out of bed and pull on a pair of jeans and a t-shirt, and then my crappy little canvas tennies without socks. The big pasture where my horse was to be found was about 80 acres, so it would be a long walk through wet grass to find her. Before catching my horse I fed and watered the chickens and turkeys, gave the cow some grain and alfalfa and fed the donkey, if he wasn’t out in the pasture with the horses. Sometimes there were other horses that were kept in a pen closer to the house and the barn, so those would get some grain, too. On my way out to the big pasture, I would drag the hose along and start the two big troughs at the near corner of the pasture filling while I went out with a rope and halter to catch Penny. I usually had time for an hour’s ride before everyone else was up and moving. During the summer months, trail rides were usually scheduled as early as 9 or 10 am, which allowed plenty of time to get showered and put on clean clothes after chores & riding. On the weekends, when most everyone was around, we could have as many as 20 people or so for breakfast. My girlfriend and her husband had recently had twins, so I would cook for everyone and handle general cleanup afterward. Weekend breakfast was always a big affair, and the older kids would often help with cracking eggs, peeling potatoes and chopping peppers. Hash browns with chopped onions, green pepper and cheese would be started first, along with the bacon or sausage. Scrambled eggs and toast were the last two items to start, since they don’t take as long to make. When making scrambled eggs, I would always count two or three eggs per person (plus one for the pan), and add a shot of whole milk or cream to the mix before adding to the pan. Breakfast would usually be a really filling meal, since lunch was typically something quick and light, like sandwiches. With people coming and going all the time, it was always a guess when it came to planning on how many to cook for. When the grill was started up, I think people could smell it for miles; lots of people would drop by at dinnertime, we never ran out of food, though.

One of my favorite Indian foods has got to be Indian Tacos. It’s very easy to make, and a great way to serve a crowd. The best part of those tacos is the fry bread. It might not be the healthiest thing on the menu, but it’s a wonderful treat. My friend’s mother, Shirley, makes the BEST fry bread, bar none. The first time I tried making it, to be honest with you, my fry bread turned out more like hockey pucks. Shirley laughed about that one. One of the elders writes about fry bread, along with a simple recipe for it, on the Mille Lacs Band website:

http://www.millelacsojibwe.org/cultureColumn.asp?id=130

And, if you are interested in learning more about the Mille Lacs Band, please stop by their main page:

http://www.millelacsojibwe.org/

If you ever happen to pass through the area, the Mille Lacs Indian Museum is well worth a visit. It is filled with artifacts and beautiful art; when I found my visit there very interesting since I know many of the people whose ancestors are in the old photos on exhibit, and some of the people who have created some of the costumes and art. If you do go, try to get the guided tour. The dry wit of an elder may cause you to think twice, and will definitely leave you with a smile.

To make Indian Tacos, you will need fry bread (1 piece per serving), and whatever other taco fixings you like. At our house, that’s usually taco meat (prepared with the packaged seasoning) or sliced grilled chicken, lettuce, tomatoes, shredded cheddar cheese, sour cream, jalapeno peppers and salsa or green chili sauce.

To assemble, layer all of your toppings on the fry bread, like an open-face sandwich. If you want to be really polite, eat with a knife and fork. Otherwise, just dig in and make a huge mess – that’s what we do around the campfire, and the dogs are quick to snap up the fallen crumbs!

The picture in this post is from another talented Flickr poster, Terrawoods. Please be sure to stop by her Flickr page, http://www.flickr.com/photos/terrawoods/ for more beautiful photographs!


Saturday, April 18, 2009

Rhubarb...Rhubarb Cake, Rhubarb Nectar, Rhubarb Mmm...

I just love it when my perennials start to sprout up out of the dirt! I am still waiting for my rhubarb to make a dramatic entrance. I guess all I can really do now is the spring clean up part and figure out where I want to grow what this year. I’ve decided to grow chamomile for the first time; I have a good sunny patch in a ditch near our mailbox that is currently nothing but crabgrass, so I figure I should give it a go and see how that turns out. If it grows, I will have tea; if only a few flowers grow, they are pretty, if anything. My hope is to eliminate the need to mow that area and catch a little rain that otherwise would partially wash out the foot of our sand driveway. My county is for the most part sand.

Speaking of rhubarb, I stumbled across a wonderful photostream on flickr.com the other day. GreenWellies is the name of the user, and she is graciously allowing me to use her rhubarb photos. They are absolutely gorgeous. Even if my own rhubarb had sprouted, her photos would still knock mine out of the park!
In her post for her photo, 'Rhubarb Maximus and the Aftereffects of Watering With Comfrey Tea', (please see it at http://www.flickr.com/photos/greenwellies/2510773072/ ) there is a recipe for her comfrey tea, which I am going to try if I can get some comfrey to start somewhere in our yard.
She has also posted a fabulous recipe for Rhubarb Nectar, here's a link: http://www.flickr.com/photos/greenwellies/2515593976/ . If you haven't tried it yet, you absolutely must! My mother-in-law made it for my wedding, mixed with Ginger Ale & served with Raspberry Sherbet on top. Another favorite of mine, definitely worth serving at a special occasion!
Here's my own contribution in the recipe genre for today. A Rhubarb cake worth making!
Rhubarb Cake

2 Tb butter, melted
1 c. packed brown
sugar
4 c. sliced rhubarb (fresh or frozen – if you use frozen, drain,
but do
not press out)
1 ½ c. sugar
1 ½ c. flour
1 ½ tsp baking
powder

tsp. salt
3 eggs
½ c. water
1 tsp.
vanilla

In a greased
9x13 pan, combine butter & brown
sugar. Top with
rhubarb.

In a large bowl, combine the
sugar, flour, baking powder
and salt.

In another bowl, whisk
the eggs, water and vanilla;
stir into dry ingredients just until
moistened. Pour over rhubarb.
Bake at 350° for 30-35 minutes or
until cake springs back when touched.
Serve with whipped cream or ice
cream.

Friday, April 17, 2009

Hobo Stew & Spring Digging

Spring always gets me in the mood to dig in the dirt, but I don’t know if my back will take anymore of the heavy work. This year, I think I will rent a roto-tiller from our local hardware store to turn up the dirt and mix in some compost before planting this year’s plants. Last year I told my boys that I needed the garden dug up and turned over; my middle son dug a 6-foot deep hole in the middle of my would-be potato patch. Not exactly what I’d had in mind.

My husband uncovered the flowerbed about 2 weeks ago. Already, the bright green shoots of my baby iris were about 2” tall. Those were a gift from my mother-in-law about 2 years ago when she divided hers, and I will probably have to divide mine within a year or two. No flowers yet, but it actually got up into the upper 60’s yesterday, so hopefully I will get some good pictures soon!
I have some big irises, also – another gift from a friend who needed to divide up an overgrown clump of plants on the side of her garage. These did not bloom last year, but I only just put them in the ground the previous fall, and then they were trampled by my horrible dogs. Those cute little garden border fences that are made of coated wire are useless against pit bulls! Do not get me wrong, my dogs are far from the vicious man-eaters the media will have you believe all bully breeds are.


Our female dog is afraid of most men and will cower behind me if my husband raises his voice to one of our kids.
Our male dog (her puppy who was born on 1/1/08) is my protector and best bud. He’s half pit-bull, half dachshund. Yep – go ahead and laugh, he looks like a wiener dog on steroids.
They are members of our family, but they are, of course, dogs – they have no concept of what garden borders and decorative edging are for. I believe I will invest a few more dollars this spring for the 2’ tall wrought-iron border fence. Maybe that will stand up to pit bulls! Although if I really need help digging, I’m sure they’d be happy to help...

When we are spending so much time outdoors, I love to grill. There’s no need to be stuck in the house, watching a boiling pot on the stove when you can be doing something better, outside! Not only that, but we are in the woods, so we don’t need air conditioning to keep the house cool (unless the oven is on). If it does get hot in the kitchen from cooking, it usually takes a while to cool down, which gives me another excuse to cook outdoors. We have a fire pit, in addition to a regular charcoal grill, so if I am really lazy, I can tell the boys to throw some sausages or hotdogs on a stick and put it in the fire for a while. Not much effort there, and Dad can supervise the fire so Mom doesn’t have to stop digging or planting or whatever! Then, if I am really lucky, one of my boys will even cook something for me, too. It’s nice when they are old enough to do things for Mom without being asked!

Here’s an easy recipe for the grill or over some coals on the edge of a campfire – I like to do this when we go camping, as there is very little mess!
Hobo Stew Packets

Ground beef (about 1/4 to
1/3 pound per person – do not use extra lean, you will not have enough moisture and the food may burn)
Vegetables (about 1 cup per person) – I use the frozen bags of mixed dinner vegetables
Cheese (2 slices per person, Velveeta, Bongard’s or other processed cheese works well in this recipe)
Tin foil – 1 square for each packet, about a foot to a foot and a half long

To prepare each packet, crumble ground beef onto a square of tin foil, top with vegetables and 2 slices of cheese. Wrap the foil around the food, sealing the edges. Place either on a hot grill or over coals at the edge of your campfire. Depending on how hot your coals are and how rare you like your hamburger, the packets should be done in 15 to 25 minutes. Be very careful removing these from the fire pit, use tongs if you have them as the packets will be very hot. The meat juices mixed with the melted cheese will make a gravy as everything cooks together, so be careful to open packets from the top, over a plate. Season to taste with salt & pepper & enjoy!

Wednesday, April 8, 2009

RE-USE! And a recipe for Egg Bake ala Leftover Easter Ham, too!

Day 4: Re-Use

In my book, re-using can be sometimes the same as recycling. To some, recycling means putting your old newspapers and plastic in a bin at the end of the driveway. OK, so if “garbage” means it will eventually end up in a landfill, the recycle bin is better than throwing that stuff in the garbage can. In our community, the garbage goes to an incinerator, which provides power. So, if it is going to be used, whatever – do what you like. I personally would rather re-use my old egg cartons for things like starter pots for my garden (cut them apart and plant the whole works in the ground once the seedling is big enough), or turn the coffee cans into something useful like a candle holder for the citronella candle we use on the deck to keep mosquitoes at bay. Once that coffee can is nasty and rusted, then it can go into the recycle bin

As I mentioned in my last post, it will be easier to re-use your cast-off items if there are fewer of them. If you can re-fill your water bottles by refilling them at the store, do it. It will save you money and you will have one less plastic jug to dispose of. For the items you do have, which have already outlived their original purpose, there are unlimited possibilities.

I love to play in my garden (I guess most people would call that work), and most of my re-used items end up there. Newspaper makes good mulch. It doesn’t have to be shredded, either. When you put your new plants in the garden, lay a piece or two down on top of the soil, then soak it thoroughly. Dig a hole where you want to put your plant, through the paper and all, and drop that plant right in. It will help to retain moisture in that spot, and will also hinder weed growth. The more time you can spend enjoying your garden (with less effort) the more you will appreciate it. Table scraps, vegetable peelings, eggshells and coffee grounds all end up in our compost pile.

A compost bin is easy to put together, if you don’t want to spend money on one. There are all sorts of things on the market if you’d like to just purchase something; I recommend something that will be easy for you to move, like the round, rollable balls that simply get rolled around every so often to mix the contents. A friend of mine has a worm barrel; she swears that she gets the best compost from it – although she has to keep it in her basement during the winter so the worms don’t freeze. Our compost pile is just a big pile of dead leaves and scraps in our back yard. My husband put up an old section of chain link fence around it (one of his own re-used items) to keep little furry friends from the woods out of it. My mother in law had the best one yet, last year – the tomatoes froze one night, the year before that; to her distress they had to pull out about 6 plants with tomatoes still on the vine. They also lost some squash. The following year they had the coolest garden “mound” – tomatoes and squash growing in reckless abandon across the ten-foot wide compost pile. Those tomatoes were better than the ones she started in her house months before the snow melted.

If I have a project that I need items for, which I don’t already have on hand, Craigslist.org has been awesome! You can always find leftover construction materials if you need wood for a small project. Good place to find what you need for a compost bin, too.

A friend of mine had a cute idea for used soup cans. She peeled off the labels and washed them up; then, with a 10-penny nail she popped holes into the can in the shape of Christmas bells, trees and stars. After painting them red, green and gold with spray paint, she gave them away to her grandkids as candleholders. It sounds tackier than they looked! I haven’t made one myself, yet – when I do I will post a picture.

My husband really likes to re-use glass pasta sauce jars as drinking glasses. If they get broken, it’s not such a big deal. If one gets left somewhere, it’s not a big loss, either. Those same jars (baby food jars especially) are really good containers for spare nuts & bolts in the garage. My grandfather had a tool collection that was the envy of every man he knew. Not only did he have every Craftsman tool ever made since the beginning of time, he also had a ton of miscellaneous hardware, all meticulously labeled and stored in its own spot. One thing he did to organize all the small stuff, was to put a screw through the inside of a baby food jar lid into a board, which he then mounted to the underside of the shelf above his workbench. The jar would be filled with washers or what-have-you, then the whole works would get screwed back onto the lid, to be suspended above his work bench. One word of caution: be sure the jar is really screwed into the lid; otherwise you will have broken glass and washers or whatever all over.

When our boys were still in diapers, I loved the wet wipe boxes – they are great for storing matchbox cars and other small toys, crayons and pencils. They easily fit in a diaper bag if you need to bring a few distractions to keep baby occupied while you grocery shop or whatever. Old t-shirts and stained dress shirts became art smocks. When I was really little, my mother’s old formal gowns and dresses became mine for playing dress-up. Never would she have dreamed of buying dress up clothes! Now I see them at Wal-Mart and praise God I didn’t have girls. No way in hell I’d dress a daughter in some of those hoochie-in-training outfits they have on their racks!

Another use for used clothing that may not be good enough for donation is to cut them up & follow Grandma’s example: start stitching! Many of my favorite quilts are made from old clothes. I can still remember which of Grandma’s dresses the aqua polyester square came from (circa 1970’s, of course); the blue, tan & white striped cotton was left over from a sewing project of my mother’s. Grandma’s gone now, and those quilts are great thing to have around – something worth keeping, that’s not clutter!

Well, with all the talk of re-using and recycling, I guess you want me to tell you what to do with your leftovers, too, right? If you’re stuck with a lot of extra ham and veggies from Easter dinner, it will go great with eggs and whatever leftover veggies you’ve got:

Egg Bake
Serves 6-8

12 eggs
3-4 cups day-old bread, dinner rolls or English muffins, torn into 1” – 2” pieces (coarse bread like ciabatta is good for this recipe)
2 cups leftover ham, diced or cut into strips
1½ cups of milk
1½ - 2 cups of leftover veggies – when I make this recipe I rarely have enough leftover veggies, so I add about 1 cup of fresh or frozen spinach
1 cup shredded cheddar or Swiss cheese (Jarlsberg is great in this recipe)
Salt & Pepper (Cayenne, too if you’d like a bit of spice) to taste

Grease a 9x13 cake pan. Spread torn bread in the bottom of the pan, and then sprinkle veggies and cheese over the top. In a separate bowl, beat the eggs and milk together; pour evenly over the top of everything. Cover with foil and refrigerate over night. The next morning, sprinkle salt and pepper on top, then pop that pan into a 350° oven for approximately 40 minutes, or until a knife inserted into the middle comes out clean – it’s done if the eggs are cooked through.

Tuesday, April 7, 2009

Day Three: Reduce!

So we all pretty much get it, right? Reduce, Re-use, and Recycle, the three R’s of living in a happy, healthy planet. I think the recycle part may be catching on, slowly but surely… but the other two?

Day Three in my Spring Cleaning series is all about REDUCING… probably the one part of the Three R’s that people are least likely to embrace. Well, wait a minute… no one likes to re-use, either… ok, so we’ll get to that one on Day 4.

There are probably a lot of us who could stand to reduce in a few areas: the clothes we keep that are no longer worn, the unmatched Glad Ware lids in our kitchen cupboards, the extra dessert we sneak when no one’s looking. The hardest step to accomplish in this arena is to avoid the excess to begin with. Reduce the amount of money you spend on “things” in general, and you may find you have less to deal with when de-cluttering time rolls around.

I’ve learned, through the course of having to move six times in three years, that there are a ton of things people carry with them that weigh them down, emotionally and physically. It can be a positive experience to purge your life of things you’ve been hanging onto, rather like “giving up the binkie” can be for a toddler. Your life moves on, bringing you into a new era; sometimes things you held on to anchor you to a phase that is better off part of your past.

Another thing I’ve learned throughout my travels is that I am capable of surviving on the bare minimum. At one point in my life, I found myself living in a trailer home in the woods of Northern Minnesota. I had no dishes or flatware when I moved in, no bed to sleep on, and not a stick of furniture in the living room. I was slowly able to find the things I needed to make the trailer resemble a home; at that point I had decided that quality was of far greater value than quantity. I did not have a lot of money, but I quickly discovered that if the need were great enough, God would provide.

Re-evaluate you purchases. It will save you money, as well as time you will spend cleaning out closets & throwing away spoiled food from the fridge. This one’s a no-brainer: If you usually buy a magazine, go to the library and check it out. Find some friends who would be interested in hand-me-downs, maybe they’ll have some for you, too. Instead of buying 3 cheap suits, get 1 really nice one and an extra sport coat to mix things up, then accessorize for a different look. Buy in bulk if it will save on packaging and money, then freeze things if you won’t use it all at once. Instead of eating out, cook extra for dinner a couple nights a week and learn to enjoy leftovers. And I mean it! No one is too good for leftovers; no matter what you picky ones may think! Just be sure to mark them with a date so you know when something’s been sitting around too long! If you think you need a gallon pail of ice cream, settle for the ½ gallon box – your waistline & pocket book will thank you.
I’m out of time for today, so I will have to post an extra recipe tomorrow!

Monday, April 6, 2009

Green Recipes for Spring Cleaning on the Cheap & 5-Bean Salad

Green Recipes for Spring Cleaning on the Cheap
Step 2: Spring-Cleaning, Day Two

I have been inundated with emails from a lot of ‘wonderful’ chemical-based cleaning product companies, trying to get me to buy their products. Spring is a great time to clean out the cobwebs & get those windows sparkly…but who says you have to buy a $5 bottle of poison to get those windows clean???

Vinegar is a great multi-purpose liquid. If it’s safe enough to consume, it won’t be harmful to you as a cleaning agent, either. Throw together this salad in the morning, it will be chilled and ready to eat when you’re done with your spring-cleaning. Goes great with grilled skinless, boneless chicken breasts.

5-Bean Salad
1½ cup sugar
¾ cup vinegar
1 can yellow wax beans
1 can green beans (not French-cut)
1 can red kidney beans
1 can garbanzo beans
1 can navy beans
1 medium onion (white, yellow or red) sliced and separated into rings or 1½” long slices

Combine sugar and vinegar in saucepan. Cook over medium-high heat until it boils, stirring constantly to dissolve all the sugar (do not allow it to over-boil). Boil until mixture is clear; remove immediately from heat.

In a large bowl or Tupperware container, combine all of the canned beans and onion. Pour vinegar syrup over all, mix well and refrigerate. Serve cold.

Because of the vinegar content, this salad will keep in the fridge for a long time – at least one whole week if not longer (it usually doesn’t last that long at our house!)


Windows
One thing I always keep on hand is a good, old-fashioned jug of white vinegar. I know the smell isn’t the greatest, which is why we do the windows first. Dilute the vinegar about 50/50 with some water, spritz on your windows & wipe with yesterday’s newspaper. The newspaper will be absorbent enough to clean the glass without streaking, and is lint-free. If you choose not to go the newspaper route, remember those old, mismatched socks, doomed to never be reunited with their mates? They’re also great rags. Once the windows are clean, wipe down the frames and sills. For the outdoor side of your windows, a squeegee is a great investment. A sponge mop works well to scrub the dirt off (using the vinegar solution), rinse with a garden hose & then squeegee from top to bottom.

Now that your windows are clean, open them up! Nothing airs out a stuffy house like an open window. That fresh air is way better than a can of air freshener! This will also help to clear the vinegar smell as well.

Kitchen
Vinegar is also great for cleaning your automatic-drip coffee pot. Run a cycle of the 50/50 vinegar/water solution through your coffee pot, and then run a cycle of clear water. I clean the basket with a baking soda & water paste on a toothbrush (a cheap toothbrush is a handy tool to keep in your cleaning arsenal).

I also keep baking soda in the house at all times. It will clean just about anything – from your teeth to your kitchen sink. Make a paste of baking soda and water, and use it wherever you have a stained countertop or baked on grease. I use it to clean the baked-on grease on the chrome burner rings on my stove. This is also effective and safe to use on uncoated pots and pans. If you want to add a little fragrance for the household applications (I don’t recommend this one for your cookware), add a drop or two of essential oil – I like oil of sweet orange or oil of lemon. Texas cedar is great-smelling oil, too – but unfortunately my allergies don’t care for that. If you are allergic to something, remember that you may also be allergic to the essential oil, as well!

Soft Surfaces
I clean from top to bottom, because that’s the direction the dirt will go. If you have curtains, take them down and shake them out - if you can hang them on a clothesline or balcony rail for an hour or two, great. Upholstered surfaces have a sneaky way of gathering dust over the winter, and absorb smell as well. Some draperies need to be dry-cleaned, but if yours don’t, spring-cleaning time can be a good time to launder them.

Thoroughly vacuum your upholstered furniture. If you don’t get in between those couch cushions often, now is the time to do it! You may even find enough spare change to buy that squeegee you need for your windows. This is a great chore to give to the kids. The prospect of finding loose change may be enough to motivate. The furniture part is where I enlist help. We have a huge sectional, which is heavier than I can possibly move on my own. Lucky for me, my three boys do not have a choice when it comes time to help. After the vacuuming part has been done, we move furniture around so the floors can get really clean. With the size of our couch there is only a limited amount of arrangement possibilities, but spring-cleaning is a good excuse to rearrange. Not only does the floor get really clean, but I also make sure the baseboards that are usually hiding behind furniture get wiped down and corners get vacuumed out, too.

Finally, pick up a bright spring bouquet at the grocery store (if you can’t pick them outside yet), and put it in a spot where you will see it. No need for a fancy vase: a mason jar from canned tomatoes or even an old piece of stoneware works. It will make the house smell good, look cheery, and help get rid of those residual winter blahs.

Day 1: Recipe for De-cluttering

Day One in a series…
Enlist everyone in the house! They helped make the mess. Why should you be the only one cleaning? This is a great project for a Saturday. Before you get busy with this project, start this roast in the crock-pot – you will have barbequed beef sandwiches for dinner with little to no effort:

BBQ Beef Sandwiches

1, 2 to 3-lb beef chuck roast
1 12 or 16-oz. Bottle BBQ sauce
Hamburger buns

Put roast in crock-pot, cover with BBQ sauce (go ahead and use the entire bottle). Turn heat on to Medium, cover and cook for 4-6 hours, or until roast pulls apart easily with fork. When done cooking, shred with fork and serve on buns. If you do not have a crock-pot, bake in a 350 degree oven for a couple of hours. There is no need to sear the meat prior to cooking.


Recipe for De-cluttering
Step 1: Pre-Spring-Cleaning, Day One

My husband is a pack rat. If there is any possible use for an item, even if it’s something that appears to be garbage to you or I, it is tossed into a box for use at some later time…if, that is, I am lucky. Those boxes end up stacked near the doorway; sometimes they even make it out to the shed. Many times these ambiguous items never find their way into a box or even get used at all; rather, they will sometimes sit on our mantle or the marble-topped bombe chest in the corner of our living room. I am sure I am not the only woman in the world with this problem, but it really stinks having a home that is decorated in the Early Garage Sale style.

When my patience has reached its limits (and Spring-Cleaning time is usually a point where my limits lie), I begin the de-cluttering process on my own. When Hubby sees this and realizes his treasures are in danger of a date with the garbage can, he’s usually more than willing to pitch in with his time and effort. Items that seem worthless to me (a handful of washers, zip ties, old hinges, nuts & bolts and other hardware odds & ends) sometimes do get used on the occasional repair project or kids’ school project, so it’s usually in his best interest to lend a hand.

Since our living room is a general catch-all for “stuff”, that’s where we put the boxes: one box we call “Stuff to Put in Its Place”, one box called “Worth Paying the $85.00 per Month for the Storage Unit”, one box that is “Still Useful Enough to Donate” and one box for “Really Not Worth Keeping (a.k.a. Garbage)”.

Once everything that does not belong in that room has been divvied up into above-mentioned boxes, everyone in the household is responsible for their own belongings that have ended up in the “Stuff to Put in Its Place” box. All the other boxes are sent to their new homes in storage, the local charity or our choice, or the trash bin.

I have certain criteria for items I part with, especially when it comes to clothing. I mustn’t allow myself to spend too much time on sorting these items, so it’s a task I know I have to be objective with. Have I worn this in the past 6 months (subjective to the seasonality of the item)? Does it have a sentimental value? Does it still really fit well? If I say no to all of the above questions, I part with it. If the item is a stained t-shirt, I know no one else will want it so that shirt may end up meeting my scissors and becoming a new dust rag. If I can recycle it, I will – as long as it will indeed get used. A 50-lb bag of dust rags won’t be plausible to keep around, and if I donate that and it’s deemed unworthy of resale it may be recycled into insulation or what-have-you. I also remind myself that if this item was liked at one point but not so wonderful anymore, I can be cleaning out closet space for a new one! Even better than the first one!

Items that appear to be clutter sometimes aren’t, really – they just are not presented neatly enough to qualify as “part of the vignette”. The afghan that is balled up in the corner of the couch needs to be folded neatly across the arm of the couch or draped artfully across the back of the recliner. The scattered mess of magazines on the floor can be stacked or fanned across the coffee table or find a home in a magazine rack. I love storage ottomans. Big or small, they provide a nice hiding spot for frequently used things like my crochet or the board games the kids like best. As long as you can keep the “hidden stuff” from accumulating to an unmanageable point, hiding places are great when you need to tidy up in a hurry.

As much as I hate the idea of a “junk drawer”, I have one. The drawer that is in an awkward spot to begin with is where we have ours. Full of useful items that have no other home, I have compartmentalized this space with Velveeta cheese boxes and a small fishing-lure box. It’s been the home to our household flashlight, tape, pencils & pens, fuses and batteries. We keep steel wool in there, too – but it a different box as the batteries, as steel wool in combination with a 9-volt battery can cause a fire – I did not know this until last summer, so keep that in mind if you have a junk drawer of your own! In our house, the kids are not allowed to put anything in the junk drawer. Is essence, it’s more of a “utility drawer”; we don’t allow anything that is just junk to go into it – so remember, the “junk drawer” shouldn’t be a hiding spot for random stuff. The Box Method works in the kitchen, too – if you’ve accumulated your mother-in-law’s Tupperware, send it back! If you put some cookies or cupcakes in one of those containers, she may forgive you for having held onto it for the last three months.

The bathroom is really an important place to keep clean. Now is a good time to clean out expired things like cosmetics, sunscreen and medications. NEVER flush old prescriptions down the toilet. In our area, we can turn them in to local law enforcement, clinics or hospitals. Check with your local agencies before disposing of these items.

Once your house has been de-cluttered, you are ready to begin Day 2… go ahead and wait until next Saturday…Sunday is a day of rest, right?

Sunday, April 5, 2009

Mock Chow Mein

A quick, low-cost alternative for those busy nights when it’s tempting to grab take-out...

Mock Chow Mein
Serves 6, cook time approximately 20 minutes


1 lb chow Mein meat (or other ground meat such as hamburger, turkey or pork)
1 can cream of celery soup
1 can cream of mushroom soup
1½ cups chopped celery
½ cup sliced almonds or cashews
3 cups white rice (quick-cooking or regular, I use regular - enough to serve 6)
Crunchy chow Mein noodles
Soy Sauce

Prepare white rice as indicated on package. While rice is cooking, do the following:
Brown meat in fry pan on high heat, chopping into small pieces as it cooks. Drain off excess fat. When browned, add chopped celery to the pan, stirring constantly, for only 3 minutes or so – just enough to heat through (celery should still be crunchy). Add both cream soups and 1 soup can full of water. Mix well until thoroughly heated through. Remove from heat and sprinkle almonds or cashews on top. Serve over rice with crunchy chow Mein noodles, add soy sauce to taste.

Feel free to switch the cream soups with whatever you have on hand. If you use ground turkey, cream of chicken soup will work well, too. If you have celery haters in your house, substitute canned water chestnuts for crunch.

Low fat hint: When browning meat, I usually do not put any oil in the pan first. If there’s not enough fat in the meat to keep it from sticking (and I usually try to buy the extra lean, when possible), add a small amount of water or broth to the pan.

Friday, April 3, 2009

Toffee Almond Sandies...mmm...

I often find myself swapping recipes with relatives or friends at work, church or elsewhere. We are all working moms, and who would know better than a working mom how important it is to share good things that work?
My hubby's aunt, Punky, gave this recipe to my mother-in-law, Dawn, who is the source of some of the best and easiest recipes I have. Absolutely maaavelous! These melt in your mouth...
Auntie Punk’s Toffee Almond Sandies
My new favorite cookie!


1 cup butter (Auntie Punk uses ½ margarine)
1 cup sugar
1 cup powdered sugar
1 cup oil
2 eggs
1 tsp almond extract
4 ½ cups flour
1 tsp baking soda
1 tsp cream of tartar
1 tsp salt
2 cups chopped almonds (sliced almonds work well, too - Punky uses walnuts)
1 package English toffee bits

Mix together butter, powdered & granulated sugars, oil, eggs and almond extract with an electric mixer.

Add all of the remaining ingredients and mix by hand. Roll dough into 1 ½” balls, then roll in granulated sugar. Place on ungreased cookie sheets and flatten a little with a glass, fork or fingers (if you use a glass, dip the bottom of the glass in sugar to keep the cookie dough from sticking).

These cookies will spread a little, flattened cookies should be spaced about 1 ½” – 2” apart.

Bake at 350° F. for 12-14 minutes (only until set firm, not brown).

Yield 8-10 dozen.

I am going to try something different next time: substituting rum extract for the almond extract, and pecans in place of the almonds. I will let you know how it turns out!